
How to Paint Brake Calipers - DIY
Step 1.
The first step in painting your calipers is to elevate one side of your car.In order to do this you will need ( a hydraulic jack x 2 or a scissor jack x 2 or a combination of these )
You will also need a tyre iron for removing the wheel nuts , or a breaker bar with appropriate sockets for your car.
With the car still on the ground proceed to loosen the wheel nuts on one side of the car, dont take them off or undo them,
simply crack them so they are loose and will be easy to turn once the car is raised
Next
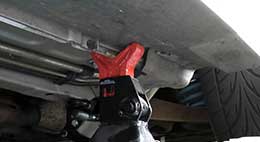
Every car has appropriate jacking points for a jack and you will need to refer to your car manual if you are not familiar with your jacking points.
Proceed to jack up one side of the car so that both front and rear wheel is just off the ground.
OPTIONAL : ** If you have the know how and experience, you would place the car on jack stands so all 4 wheels are off the ground allowing to run this process only once across all 4 calipers in the one session.
Step 2.
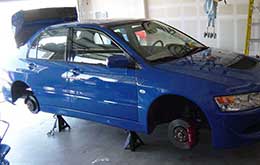
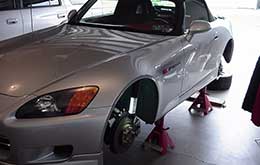
The second step is to remove the 2 wheels which are now elevated off the ground.Because the wheel nuts are already loose you may easily undo them all and take off both wheels.
Note **Once removed place each wheel according to where you took it off from so that on refitting, the same wheel goes back into its relative position.
Refer to below picture :
Step 3.
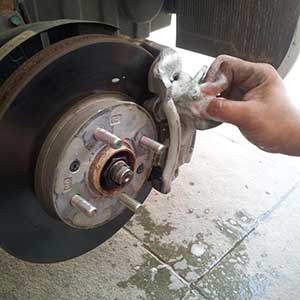
Now the brake calipers are exposed, you will need to clean them up.The best way to do this is to take off the heavy brake dust with a wire brush or some scotch brite.
Follow this up by cleaning the caliper liberaly with methylated spirits. The spirits will wash away contaminants and ensure better paint finish.
Dont be worried if you cant reach some spots and a little bit of brake dust remains.
Step 4.
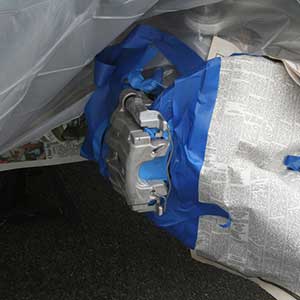
After both calipers have been cleaned it is now time to mask the surrounds of the caliper to ensure we only paint the caliper.You will need some 36mm wide masking tape and a newspaper/ masking paper
Begin by masking out the brake disk and brake pad ( if possible ) , be patient as this part is fairly time consuming.
Using newspaper, cover up your suspension components, use the masking tape to secure the newspaper in place.
cover the brake disk with newspaper and apply masking tape to hold in place.
Try your best to use the masking tape and cover anything that you dont wish to be painted.
The more accurate you are with the masking the better the end result.
Refer to this picture for an example of a well masked caliper assembly.
Step 5.
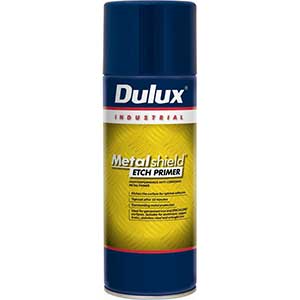
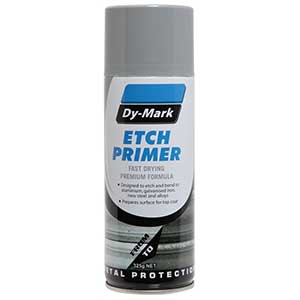
The next step is to use an Etch primer ( I recommend Dulux metalshield etch primer , or DyMark etch primer both can be purchased at bunnings )Apply a mist coat of primer on each caliper , by mist coat we mean do not paint it or try to cover it just do a very light coat in all the areas you can reach.
Wait around 5 to 10 minutes and apply a slightly thicker coat so that the caliper is covered with etch primer.
Wait for the primer to dry. Usually if you can see any areas which look wet , the caliper is not dry.
I find around 10 minutes is fine. You can test by touching spots with your pinky finger to see if its dry.
Step 6.
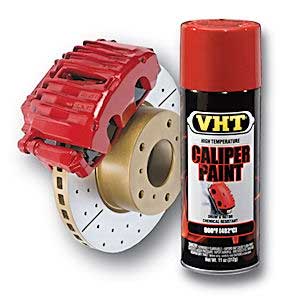
Applying your colour : ( we recommend either VHT Caliper Paint or Dulux Quick Dry Paint ) Yes the calipers do get hot, but the dulux stuff seems to hold up fine as we have tested it on a track car.Same as the primer , apply a very light mist coat first to each caliper waiting around 5 to 10 minutes to dry.
Apply a second mist coat , waiting 5 minutes and finally apply a coat that covers the caliper in your colour.
Do not keep applying once it is covered, there is no point.
Step 7.
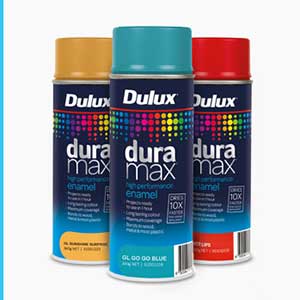
Wait around 10 minutes or until they are dry and apply a gloss coat. we recommend either ( VHT caliper paint gloss ) or ( DULUX Duramax Gloss )We have tested both and they both produce the same result and heat resistance for a DIY job.
Again apply a light mist coat of gloss waiting around 5 minutes or so and then apply a good coat of gloss.
The caliper will have a wet look to it if done correctly. As soon as a section looks wet do not spray there again as you run the risk of runs.